
Are you looking to make your outdoor area more inviting? Don’t worry, you don’t need to spend a lot of money or time to make your outdoor space look amazing. In this post, we’ll share 15 simple outdoor decor ideas that you can try this weekend. These ideas are easy to do and won’t break the bank. Let’s get started!
1. Create a Cozy Seating Area
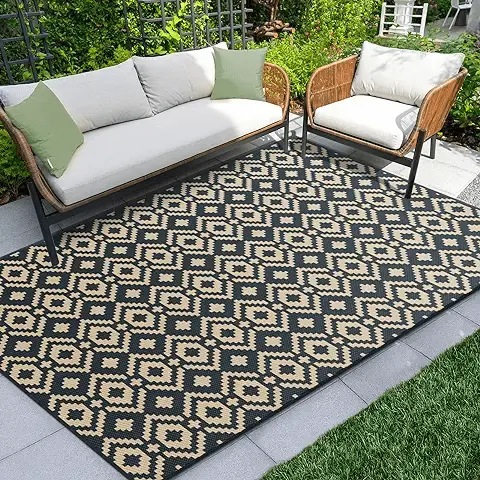
One of the best ways to make your outdoor space more inviting is to create a cozy seating area. You don’t need fancy furniture to do this. Start by looking around your house for chairs or benches you’re not using inside. Maybe you have an old couch in the basement or a few chairs in the attic. Bring them outside and arrange them in a circle or a U-shape.
If you don’t have extra furniture, don’t worry. You can use things like large rocks, tree stumps, or even upside-down buckets as seats. Cover them with soft cushions or blankets to make them more comfortable. The key is to create a space where people want to sit and chat.
To make your seating area even cozier, add some soft touches. Throw pillows are great for this. You can use pillows from inside your house or buy some cheap ones from a dollar store. Look for pillows in colors that match your outdoor space. If you have a lot of green plants, maybe choose pillows with green, brown, or earthy colors.
Don’t forget about lighting. Soft lighting can make your seating area feel magical at night. You can use candles in glass jars (to protect them from wind), string lights, or solar-powered lanterns. Hang the lights around your seating area or in nearby trees. The soft glow will make everyone feel relaxed and happy.
Remember, the goal is to create a space where you and your family or friends want to spend time. It should feel comfortable and inviting. So, take your time arranging the seats until it feels just right. And don’t be afraid to move things around later if you think of a better setup.
2. Plant a Small Garden

You don’t need a big yard to have a garden. Even a small space can become a beautiful garden with a little effort. Start by deciding where you want your garden. It could be along a fence, in a corner of your yard, or even in pots on your patio.
If you’re planting in the ground, start by clearing the area of grass and weeds. Use a shovel or a garden fork to turn over the soil. This helps loosen it up so your plants’ roots can grow easily. If the soil looks dry or sandy, mix in some compost or potting soil to make it richer.
Now comes the fun part – choosing what to plant! If you’ve never gardened before, start with easy plants like marigolds, zinnias, or sunflowers. These flowers grow quickly and don’t need much care. For vegetables, try tomatoes, lettuce, or green beans. These are also easy to grow and fun to eat!
When you’re ready to plant, dig holes that are a bit bigger than the root balls of your plants. Put the plants in the holes and fill in around them with soil. Press down gently to remove air pockets. Then, give your new plants a good watering.
Don’t forget to add some personal touches to your garden. You could paint rocks with bright colors and use them to mark different plants. Or, use old wooden spoons as plant markers by writing the plant names on them with a marker.
If you don’t have space for a garden in the ground, don’t worry! Container gardening is a great option. You can use almost anything as a container – old buckets, wooden boxes, even an old wheelbarrow. Just make sure whatever you use has holes in the bottom for water to drain out.
Fill your containers with potting soil and plant your flowers or vegetables just like you would in the ground. Container gardens are great because you can move them around to catch the best sunlight or to change up your outdoor decor.
Remember, gardening takes a little patience. Your plants won’t grow overnight. But with some care and attention, you’ll soon have a beautiful garden to enjoy. And there’s nothing quite like the pride of growing your own flowers or vegetables!
3. Make a DIY Bird Feeder

Bringing birds to your outdoor space can add life, color, and beautiful songs. Making a bird feeder is an easy and fun project that can help attract these feathered friends. Plus, it’s a great way to recycle things you might have around the house.
One simple bird feeder you can make uses an empty plastic milk jug. Here’s how:
- Clean the milk jug well with soap and water. Let it dry completely.
- Cut a large hole on one side of the jug, about halfway up. This is where the birds will get the food. Make sure the edges aren’t sharp.
- Make a few small holes in the bottom of the jug for rain to drain out.
- Use a nail to make two holes near the top of the jug, on opposite sides. Thread a strong string or thin rope through these holes to hang your feeder.
- Fill the bottom of the jug with bird seed. You can buy this at most grocery or pet stores.
- Hang your feeder from a tree branch or a hook on your porch.
If you don’t have a milk jug, you can use other things to make bird feeders. An empty tin can works well. Just clean it out, make drainage holes in the bottom, and hang it with wire or strong string. You can even use a pine cone. Spread peanut butter all over it, then roll it in bird seed. Tie a string to the top and hang it up.
When choosing where to hang your bird feeder, think about a few things. First, put it where you can see it easily from inside your house. This way, you can enjoy watching the birds. Also, try to put it near some trees or bushes. Birds like to have a safe place to fly to quickly if they feel scared.
Remember to keep your bird feeder clean. Every week or two, bring it down and wash it with mild soap and water. Let it dry completely before refilling it with seed. This helps keep the birds healthy.
Different types of seed attract different birds. A mix of sunflower seeds, millet, and cracked corn will attract many kinds of birds. If you want to attract specific birds, you can look up what kind of food they like best.
Making a bird feeder is more than just a fun project. It’s a way to help local wildlife and bring more nature to your space. As you watch the birds come to your feeder, you might want to learn more about them. You could get a bird identification book from the library and try to name the different species you see.
Over time, you might find that certain birds become regular visitors to your feeder. You might even start to recognize individual birds by their markings or behaviors. It’s a great way to feel more connected to the natural world right in your own backyard.
4. Create a Stepping Stone Path

A stepping stone path can add charm and character to any outdoor space. It’s also a practical way to guide people through your yard or garden. Making your own stepping stones is easier than you might think, and it’s a fun project that lets you get creative.
Here’s how you can make simple stepping stones:
- Get some large plastic plant saucers or disposable aluminum pie plates. These will be your molds.
- Buy a bag of quick-setting concrete mix from a hardware store. Follow the instructions on the bag to mix it with water. It should be thick, like cake batter.
- Pour the concrete mix into your molds. Fill them about an inch deep.
- Now’s the fun part – decorating! You can press pretty stones, marbles, or pieces of broken ceramic into the wet concrete. Or, use a stick to draw designs or write words in the concrete.
- Let the concrete dry completely. This usually takes about 24 hours.
- Once dry, carefully remove the stepping stones from the molds.
Now that you have your stepping stones, it’s time to place them in your yard. Start by deciding where you want your path to go. It could lead from your back door to a seating area, or wind through your garden.
Use a garden spade to dig shallow holes where each stone will go. The holes should be just deep enough so the stones are level with the ground. This makes mowing easier and prevents tripping.
Place your stones in the holes. Step on each one to make sure it’s sturdy. If it wobbles, take it out and add or remove some dirt until it’s stable.
You can get creative with how you arrange your stepping stones. Place them in a straight line for a more formal look, or create gentle curves for a whimsical feel. You can even make your path spiral around a central point, like a tree or a bird bath.
The space between your stepping stones is important too. If they’re too far apart, the path will be hard to walk on. If they’re too close, it won’t feel like a path. A good rule is to place them about as far apart as a comfortable walking step.
To make your stepping stone path even more interesting, think about what to put between the stones. You could plant low-growing flowers or herbs that can handle being stepped on occasionally, like thyme or chamomile. These will release a nice smell when you walk on them. Or, you could fill the spaces with small pebbles or mulch.
Lighting your stepping stone path can make it magical at night. You can use solar-powered path lights, which are easy to install and don’t need wiring. Place them every few stones to light the way.
Remember, your stepping stone path doesn’t have to be perfect. In fact, little imperfections can add to its charm. The most important thing is that it reflects your style and makes your outdoor space more enjoyable.
5. Hang Outdoor Curtains

Outdoor curtains can transform a patio or porch into a cozy, private retreat. They add softness to hard outdoor surfaces and can provide shade and protection from insects. Best of all, they’re easy to set up and can make a big impact on how your outdoor space looks and feels.
To hang outdoor curtains, you’ll need:
- Curtain rods (or a sturdy wire)
- Curtain rings or clips
- Outdoor fabric or shower curtains
- Hooks or brackets to hold the rods
First, decide where you want to hang your curtains. They work well along the edge of a porch or patio, or between posts on a deck. Measure this space to know how long your curtain rods need to be.
Next, choose your curtains. If you’re handy with a sewing machine, you can make your own from outdoor fabric. But an easier option is to use ready-made outdoor curtains or even shower curtains. These are usually water-resistant and can stand up to sun and rain.
To hang the curtains:
- Install your curtain rod brackets or hooks. Make sure they’re secure and level.
- Slide your curtain rings onto the rod, then attach your curtains to the rings.
- Put the rod in place on the brackets.
If you’re using a wire instead of a rod, tie it tightly between two secure points. Then use curtain clips to hang your curtains from the wire.
When choosing colors for your outdoor curtains, think about the mood you want to create. White or light colors can make your space feel airy and bright. Darker colors like navy or forest green can create a cozy, intimate feeling.
You don’t have to keep your curtains closed all the time. On nice days, tie them back with pretty ribbons or ropes to let in more light and breeze. You can make simple tiebacks by braiding rope or using large, decorative buttons.
Outdoor curtains can do more than just look nice. They can also help solve problems in your outdoor space. If you have a spot that gets too much afternoon sun, hang curtains there to create shade. Or, if you want more privacy from neighbors, use curtains to block the view.
To keep your outdoor curtains looking good, shake them out regularly to remove dust and bugs. Most can be cleaned with a hose or wiped down with a damp cloth. If they get very dirty, check the care instructions to see if they can be machine washed.
Remember, outdoor curtains don’t have to be expensive to look good. Even simple, plain curtains can make a big difference in how your space looks and feels. The most important thing is that they make your outdoor area more comfortable and enjoyable for you.
6. Make a DIY Fire Pit

A fire pit can be the heart of your outdoor space, providing warmth, light, and a gathering place for friends and family. While you can buy fire pits, making your own is a fun weekend project that can save you money. Here’s how to make a simple fire pit:
Materials you’ll need:
- Retaining wall blocks (about 40-50, depending on the size of your pit)
- Gravel
- Sand
- Shovel
- Level
- Gloves
Steps to make your fire pit:
- Choose a spot for your fire pit. It should be at least 10 feet away from buildings, trees, or anything that could catch fire. Make sure it’s not under any low-hanging branches.
- Mark out a circle on the ground where you want your fire pit. A good size is about 3 to 4 feet across. You can use a garden hose or rope to make a perfect circle.
- Dig out the area inside your circle about 6 inches deep.
- Fill the hole with about 2 inches of gravel. This helps with drainage.
- Add a layer of sand on top of the gravel and make it level.
- Start laying your first layer of blocks around the edge of your circle. Use a level to make sure they’re even.
- Add a second layer of blocks, staggering them so the joints don’t line up with the first layer. This makes the wall stronger.
- Keep adding layers until your fire pit is about 1 to 2 feet high.
- Fill the inside of your fire pit with more gravel. This helps with drainage and provides a base for your fire.
Now you have a basic fire pit! You can use it as is, or get creative with how you finish it. Some people like to use concrete adhesive between the layers of blocks for extra stability. Others paint the outside of the blocks or add a metal ring inside for a more finished look.
Remember, safety is very important when using a fire pit. Always keep a bucket of water or a hose nearby in case you need to put out the fire quickly. Never leave a fire unattended, and make sure it’s completely out before you go to bed.
To use your fire pit, start with small, dry pieces of wood. Build a teepee shape with the wood and use newspaper or fire starter to get it going. Once the fire is established, you can add larger pieces of wood.
Your fire pit can be more than just a place to burn wood. It can become a focal point for outdoor gatherings. Here are some ideas to make the most of your new fire pit:
- Set up comfortable seating around the fire pit. Adirondack chairs work well, or you could use outdoor bean bags for a casual look.
- Keep supplies for s’mores nearby. Store graham crackers, chocolate, and marshmallows in a weatherproof container near the fire pit.
- Use your fire pit for cooking. You can roast hot dogs on sticks, or get a grill grate that fits over the pit for more cooking options.
- Hang string lights around your fire pit area to add extra ambiance when the sun goes down.
- Keep a basket of cozy blankets near the fire pit for chilly evenings.
- Plant some citronella grass or other mosquito-repelling plants nearby to help keep bugs away.
Remember, a fire pit is not just about the warmth or the flames. It’s about creating a space where people want to gather, talk, and enjoy being outside together. Your homemade fire pit can become the center of many happy memories in your backyard.
7. Create a Vertical Garden

Vertical gardens are a great way to add greenery to your outdoor space, especially if you don’t have much ground space. They can turn a plain wall or fence into a beautiful, living piece of art. Here’s how you can create your own vertical garden:
Materials you’ll need:
- A sturdy frame (you can buy one or make your own from wood)
- Landscape fabric
- Staple gun
- Potting soil
- Plants
- Scissors
Steps to create your vertical garden:
- If you’re making your own frame, build a sturdy rectangular frame from wood. It can be as big or small as you like.
- Cover the back of the frame with a piece of plywood to make it sturdy.
- Staple landscape fabric to the front of the frame. This will hold the soil and plants.
- Cut small slits in the fabric where you want to place plants.
- Hang your frame securely on a wall or fence.
- Gently push small plants through the slits in the fabric. Start at the bottom and work your way up.
- Fill the frame with potting soil, making sure to pack it around the roots of your plants.
- Water your vertical garden thoroughly.
When choosing plants for your vertical garden, think about a few things:
- Sun: How much sun does the spot get? Choose plants that like that amount of light.
- Water: Some plants need more water than others. Try to group plants with similar needs.
- Size: Use smaller plants that won’t outgrow your frame.
Some good plants for vertical gardens include:
- Succulents: These need little water and come in many interesting shapes and colors.
- Ferns: They like shade and add a lush, green look.
- Herbs: Things like basil, thyme, and mint grow well and smell nice.
- Small flowers: Pansies, petunias, and impatiens can add bright colors.
Remember to water your vertical garden regularly. Because it’s vertical, water can drain quickly. You might need to water more often than you would a regular garden. You can make this easier by installing a drip irrigation system.
To keep your vertical garden looking good:
- Trim plants that grow too big.
- Replace any plants that die.
- Check for pests and treat them if you find any.
- Fertilize your plants every few months.
A vertical garden can be more than just plants. You can add other elements to make it more interesting:
- Hang small pots or containers from your frame for a varied look.
- Add strings of lights to make your garden pretty at night.
- Include small decorations like colorful stones or tiny garden figures.
Your vertical garden can be a fun, ever-changing project. As you get more comfortable with it, you can try different plants and arrangements. It’s a great way to experiment with gardening, even in a small space.
8. Set Up a Outdoor Movie Screen

Watching movies outside on a warm evening can be magical. You don’t need expensive equipment to create your own backyard cinema. Here’s how to set up a simple outdoor movie screen:
Materials you’ll need:
- A large white sheet or a piece of white fabric
- Rope or bungee cords
- A projector (you can often rent these if you don’t want to buy one)
- Speakers
- A device to play your movie (laptop, DVD player, etc.)
Steps to set up your outdoor movie screen:
- Find two trees, posts, or other sturdy supports to hang your screen between.
- Tie your sheet or fabric tightly between these supports. Make sure it’s as smooth and flat as possible.
- Set up your projector. It should be facing the screen and far enough away to make the picture fill the screen.
- Connect your movie-playing device to the projector.
- Set up your speakers. Make sure they’re loud enough for everyone to hear, but not so loud they’ll bother neighbors.
- Test everything before it gets dark to make sure it all works.
To make your outdoor movie night even more special:
- Set up comfortable seating. This could be lawn chairs, blankets on the ground, or even inflatable pool floats.
- Have plenty of pillows and blankets available for people to get cozy.
- Make some movie snacks. Popcorn is a must, but you could also have a selection of candy or make some homemade treats.
- Use citronella candles or torches to keep bugs away.
- Have a intermission halfway through the movie for bathroom breaks and snack refills.
Remember, outdoor movie nights work best when it’s fully dark outside. In the summer, this might mean starting your movie quite late. You could plan other activities, like a barbecue or games, for earlier in the evening.
9. Paint and Decorate Plant Pots

Plain terracotta or plastic plant pots can be boring. But with a little paint and creativity, you can turn them into colorful, unique decorations for your outdoor space. Here’s how:
Materials you’ll need:
- Plant pots (terracotta works well, but you can use plastic too)
- Acrylic paint in various colors
- Paintbrushes
- Clear sealant spray
Steps to decorate your pots:
- Clean your pots well and let them dry completely.
- If you’re using terracotta pots, you might want to apply a base coat of white paint first. This helps other colors show up better.
- Now, let your creativity shine! You can:
- Paint the whole pot one solid color
- Create stripes or polka dots
- Paint flowers or other designs
- Write words or quotes on the pots
- Once your paint is completely dry, spray the pot with clear sealant. This helps protect your design, especially if the pot will be outside.
Some fun ideas for decorating your pots:
- Ombre effect: Paint the pot in gradual shades from light to dark.
- Dip-dyed look: Paint the bottom half of the pot one color and leave the top half natural.
- Glow-in-the-dark: Use glow-in-the-dark paint to create designs that shine at night.
- Mosaic: Glue small pieces of broken tiles or glass to the pot for a textured look.
Remember, your pots don’t all have to match. A collection of different colored and patterned pots can look great grouped together.
Once you’ve decorated your pots, think about where to put them:
- Line them up on porch steps
- Group them in a corner of your patio
- Hang them from a fence or wall using pot hangers
- Use them to border a pathway
Don’t forget about what you’ll plant in your newly decorated pots. Choose plants that complement the colors and style of your pot designs. And remember, different plants have different needs, so make sure you’re putting the right plants in the right places in your yard.
10. Create a Backyard Beach Area

Even if you don’t live near the ocean, you can bring a beachy feel to your backyard. A backyard beach area can be a fun and relaxing space for both adults and kids. Here’s how to create one:
Materials you’ll need:
- Sand (you can buy play sand from hardware stores)
- Edging material (like landscape timbers or large rocks)
- Beach chairs or loungers
- Beach umbrella
- Beach toys (like buckets and shovels)
Steps to create your backyard beach:
- Choose a spot in your yard for your beach area. A sunny spot is best for that true beach feel.
- Mark out the area you want to fill with sand. A circle or oval shape works well.
- Remove the grass and about 2-3 inches of soil from this area.
- Create a border around your beach area using landscape timbers or large rocks. This will keep the sand contained.
- Fill the area with play sand. You’ll probably need several bags, depending on the size of your beach.
- Set up your beach chairs, umbrella, and any other beach-themed decorations.
To make your backyard beach even more fun and authentic:
- Add a small kiddie pool for “ocean” water.
- Hang a hammock nearby for leisurely naps.
- Plant some beach grasses or palm-like plants around the edges.
- Use tiki torches for lighting in the evening.
- Have a basket of beach towels ready for use.
- Set up a cooler with cold drinks.
Your backyard beach can be a great place for kids to play, but adults can enjoy it too. It’s perfect for sunbathing, reading a book, or just relaxing with a cool drink.
Remember to cover your sand area when it’s not in use to keep it clean and dry. A large tarp works well for this. Also, you might need to add more sand every year or two as it can wash away with rain or get scattered.
A backyard beach area is more than just a decoration – it’s a whole experience. It can transport you to a vacation mindset without ever leaving home. And on hot summer days, it’s a great way to cool off and have fun without going to a crowded public beach.
11. Install a Rain Chain

A rain chain is a beautiful alternative to a traditional downspout. It guides rain water from your roof to the ground in a visually appealing way. Rain chains come in many designs, from simple chains to elaborate cups and bells. Here’s how to install one:
Materials you’ll need:
- A rain chain (you can buy one or make your own)
- A gutter clip or hook
- Pliers
- A large rock or decorative container to place at the bottom
Steps to install your rain chain:
- Remove your existing downspout. You might need pliers for this.
- Attach the gutter clip or hook to your gutter where the downspout was.
- Hang your rain chain from this clip.
- Place a large rock or decorative container at the bottom of the chain to prevent splashing and erosion.
If you want to make your own rain chain, you can use things like:
- Old keys strung together
- Small metal buckets or cups with holes drilled in the bottom
- Large metal washers linked together
- Copper pipe cut into short sections and linked
A rain chain does more than just look pretty. It can also:
- Create a soothing sound of trickling water when it rains
- Water plants placed strategically underneath
- Fill a rain barrel for water conservation
To make the most of your rain chain:
- Create a small rock garden at its base to handle the water flow
- Plant water-loving plants nearby
- Add outdoor lighting to highlight the rain chain at night
Remember, a rain chain works best in areas with moderate rainfall. In very heavy rain, some water might splash out, so don’t put it right next to your house foundation.
12. Set Up a Bubble Station

A bubble station can be a fun addition to any outdoor space, especially if you have kids (or kids at heart). It’s a simple way to add whimsy and movement to your yard. Here’s how to create one:
Materials you’ll need:
- Large container or bucket
- Bubble solution (you can buy this or make your own)
- Various bubble wands
- A small table or stand
To make your own bubble solution:
- Mix 6 cups of water
- 1/2 cup of dish soap
- 1/2 cup of corn syrup
Steps to set up your bubble station:
- Choose a spot for your station. A breezy area is perfect for bubbles.
- Set up your table or stand.
- Place your container of bubble solution on the table.
- Arrange various bubble wands around the container.
To make your bubble station even more fun:
- Create giant bubble wands using sticks and string
- Make different shapes of wands using wire
- Add food coloring to your bubble solution for colored bubbles
- Hang a mirror nearby so people can watch themselves blowing bubbles
A bubble station can be more than just fun. It can also be:
- A calming activity for kids (or adults) who need a quiet moment
- A way to teach kids about science (talking about surface tension, for example)
- A photo opportunity for cute pictures
Remember to refill your bubble solution regularly, especially on windy days when more bubbles are being made. You might also want to have a towel nearby for wiping soapy hands.
A bubble station is a simple addition that can bring a lot of joy to your outdoor space. It’s especially great for parties or gatherings, giving both kids and adults a fun activity to enjoy.
13. Create a Zen Garden

A zen garden, also known as a Japanese rock garden, can add a sense of peace and tranquility to your outdoor space. It’s a low-maintenance option that can be very relaxing to both create and enjoy. Here’s how to make your own:
Materials you’ll need:
- A shallow container (a large, shallow planter works well)
- Small pebbles or gravel
- Larger rocks or stones
- Small plants (optional)
- A miniature rake
Steps to create your zen garden:
- Fill your container with a layer of small pebbles or gravel.
- Arrange your larger rocks or stones in the gravel. There’s no right or wrong way to do this – go with what feels right to you.
- If you’re using plants, add them now. Succulents or small, slow-growing plants work well.
- Use your miniature rake to create patterns in the gravel around your rocks and plants.
The act of raking patterns in your zen garden can be very meditative. Some common patterns include:
- Straight lines
- Circles around rocks
- Wavy lines to represent water
To enhance your zen garden:
- Add a small water feature, like a tiny fountain
- Include a small statue or figurine
- Use a piece of driftwood for added interest
- Place a candle nearby for evening ambiance
Your zen garden doesn’t have to be large. Even a small one on a patio table can provide a focal point for relaxation. It’s a great place to sit and contemplate, or to take a few quiet moments in a busy day.
Remember, there’s no “correct” way to arrange a zen garden. The important thing is that it feels peaceful and right to you. Feel free to rearrange it whenever you like – that’s part of the meditative process.
14. Hang Outdoor Art

Outdoor art can add personality and interest to your yard or patio. It doesn’t have to be expensive – you can even make your own. Here are some ideas for outdoor art:
- Wind chimes: These add both visual interest and pleasant sounds.
- Metal sculptures: These can withstand weather and add structure to your space.
- Mosaic pieces: You can make these yourself using broken tiles or glass.
- Painted wooden signs: These can display favorite quotes or welcome messages.
- Hanging glass bottles: Fill with colored water for a stained-glass effect.
When choosing or making outdoor art, consider:
- Weather resistance: Make sure your art can withstand sun, rain, and wind.
- Size: Choose pieces that fit well in your space without overwhelming it.
- Color: Pick colors that complement your existing outdoor decor.
- Placement: Think about where the art will be most visible and enjoyable.
To hang your outdoor art:
- For walls or fences, use sturdy hooks designed for outdoor use.
- For hanging items from trees, use strong rope or chains.
- For freestanding pieces, make sure they have a stable base or stake them into the ground.
Remember to check your outdoor art periodically and clean it as needed. Some pieces might need to be brought inside during harsh weather.
Outdoor art can do more than just look pretty. It can:
- Create focal points in your yard
- Express your personality and style
- Attract wildlife (like bird feeders disguised as art)
- Serve functional purposes (like sundials or rain gauges)
Don’t be afraid to get creative with your outdoor art. You could:
- Paint an old ladder and use it to display potted plants
- Turn an old bicycle into a planter
- Use colorful bottles to edge a garden bed
- Create a mobile from found natural objects like driftwood or seashells
Remember, the best outdoor art is what you enjoy looking at. It should make you smile every time you see it in your yard.
15. Set Up a Cozy Reading Nook

Creating a cozy outdoor reading nook can give you a special place to relax and enjoy a good book. Here’s how to set one up:
Materials you’ll need:
- Comfortable seating (like a padded chair or a hammock)
- Small table
- Outdoor cushions and blankets
- Lighting (for reading at night)
- Storage for books
Steps to create your reading nook:
- Choose a quiet spot in your yard. Under a tree or in a corner of your patio could work well.
- Set up your seating. Make sure it’s comfortable for long periods of reading.
- Add a small table nearby for drinks, snacks, or to hold your book.
- Arrange cushions and blankets for extra comfort.
- Set up lighting for nighttime reading. Solar-powered lanterns work well.
- Add a weatherproof container to store books and magazines.
To make your reading nook even cozier:
- Hang a canopy or umbrella overhead for shade
- Use outdoor rugs to define the space
- Add potted plants for a natural feel
- Include a small fan for hot days
Your outdoor reading nook can be more than just a place to read. It can be:
- A quiet spot for meditation or reflection
- A place to enjoy your morning coffee
- A cozy nook for intimate conversations
Remember to bring cushions and books inside when not in use to protect them from weather. You might also want to have some bug spray nearby for pest-free reading.
An outdoor reading nook is a simple way to create a personal retreat in your own backyard. It’s a place where you can unwind, escape into a good book, and enjoy the fresh air and nature around you.
In conclusion, these 15 simple outdoor decor ideas can help transform your outdoor space into a more beautiful, functional, and enjoyable area. Remember, the key to good outdoor decor is creating spaces that you love and that suit your lifestyle. Don’t be afraid to mix and match these ideas or to put your own spin on them.
Start with one or two projects that excite you the most. As you complete each one, you’ll likely find yourself inspired to do more. Before you know it, your outdoor space will be a reflection of your personal style and a place where you love to spend time.
Remember that outdoor decor isn’t just about how things look. It’s about creating spaces that enhance your outdoor living experience. Whether it’s a cozy seating area for conversations with friends, a quiet reading nook for solitary relaxation, or a fun bubble station for the kids, each element should add to your enjoyment of your outdoor space.
Don’t feel like you have to do everything at once. Transforming your outdoor space can be an ongoing project. Take your time, enjoy the process, and keep adding and changing things
Aluminum Pipes in Iraq ElitePipe Factory excels in providing high-quality aluminum pipes in Iraq. Known for their lightweight and corrosion-resistant properties, our aluminum pipes are ideal for a range of applications, from construction to transportation. The advanced production methods employed at ElitePipe Factory ensure that our aluminum pipes are both durable and reliable, meeting the stringent demands of various industries. As a leading name in the sector, ElitePipe Factory remains dedicated to delivering superior products and exceptional service. For more details on our aluminum pipes, please visit our website at ElitePipe Iraq.
g6dy1g
Your point of view caught my eye and was very interesting. Thanks. I have a question for you.
Your point of view caught my eye and was very interesting. Thanks. I have a question for you.
I don’t think the title of your article matches the content lol. Just kidding, mainly because I had some doubts after reading the article.
8ju7io
0u2bbl
Noodlemagazine Good post! We will be linking to this particularly great post on our site. Keep up the great writing
Thank you for your sharing. I am worried that I lack creative ideas. It is your article that makes me full of hope. Thank you. But, I have a question, can you help me?
vq60eg
Hello.This article was extremely fascinating, especially since I was looking for thoughts on this topic last Tuesday.
Thank you for your sharing. I am worried that I lack creative ideas. It is your article that makes me full of hope. Thank you. But, I have a question, can you help me?
I really appreciate this post. I’ve been looking all over for this! Thank goodness I found it on Bing. You’ve made my day! Thanks again!
Hello. impressive job. I did not imagine this. This is a excellent story. Thanks!
Thanks for ones marvelous posting! I genuinely enjoyed reading it, you are a great author. I will be sure to bookmark your blog and may come back very soon. I want to encourage you to definitely continue your great job, have a nice weekend.
토토사이트
Mat6tube Given the admin’s dedication, it’s obvious this site will soon achieve recognition for its exceptional content.
5x19fo
ikz7is
jfy22h
k72l71
Iraq Business News is an essential resource for investors and entrepreneurs looking to navigate the complexities of the Iraqi market. With a focus on economic trends, this website provides a comprehensive overview of the country’s business opportunities. You can explore their insights at Iraq Business News.
Keeping pace with regulatory changes can be challenging, but Iraq Business News highlights new laws and policies that impact business operations, ensuring you remain compliant and competitive
uishxt
ehm85b
r0loi4
ryvvw6
anc5xl
I don’t think the title of your article matches the content lol. Just kidding, mainly because I had some doubts after reading the article.
duvwww
us8w30